
P86 Audio Oscillator
-
09 October 2016 |
-
10 October 2016 |
Playing with and trouble-shooting audio circuits often requires some kind of signal generator so you can figure out what’s going on. You can verify the gain of an amplifier stage, check for distortion, or just follow the signal through the circuit so you can figure out why there’s nothing coming out the other end. In the past, I’ve used a signal generator app on my phone, but I got sick of the interface and constantly having to go through various layers of software UI just to quickly change a setting. I wanted a piece of dedicated hardware to do the job instead.
I decided to build an ESP P86 mini audio oscillator because it’s a compact circuit that produces sine and square-wave output covering the whole audio bandwidth - and because I already had an unpopulated board in a box from a previous order. :)
The circuit is fairly simple, and you could easily build it on prototyping board. I bought the PCB because it’s cheap, makes my life easier and helps keep the ESP site going. Rod recommends TL062 opamps for battery operation on a single 9V supply, but any industry standard dual opamp with sufficient bandwidth will do. The TL062 is the low power version of the TL082 (the ubiquitous TL072 is the lower noise, higher fidelity version).
I chose to use the TL062 simply because I had a few in a drawer and planned to run it from a 9V battery. That is, of course, where the problems started…
After assembling the board, I couldn’t get a signal out of it. Probing around the circuit with a ‘scope revealed no oscillation of any kind, but one of the voltage rails (the power supply splits 9V into two 4.5V rails) was being dragged down. Increasing my bench power supply to see what was happening resulted in one of the chips getting quite hot. So it was obviously dead and dragging the rail down.
After de-soldering and preparing to replace it, I decided to test the new chip first. That was a good idea. After building a quick oscillator circuit on my bread board, I discovered that all my TL062s were dead on one side. This was, as you can imagine, less than amusing. I think I got those chips from ebay, but I can’t really remember. I don’t buy higher value parts on ebay (such as power transistors or OPA2134 opamps) because of the problems with fakes, but these aren’t very pricey chips.
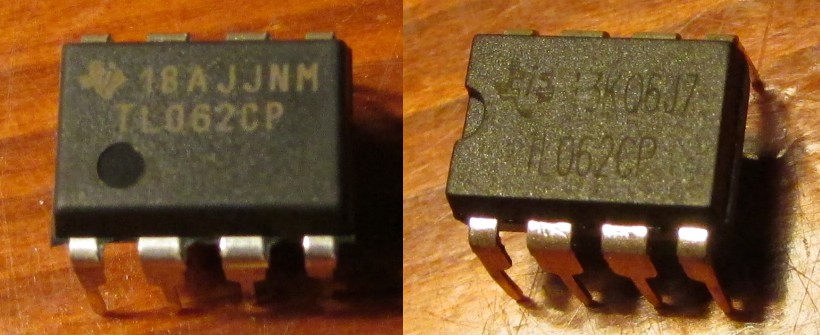
Anyway, I could have just replaced them with TL072s that I knew were good, but I wanted to see if new TL062s would look any different to the dead ones. I bought new parts from RS-components, and on arrival, it was immediately obvious that the dead ones were fakes. The lettering on the fakes is very very faint and completely the wrong font size compared to genuine Texas Instruments parts. Lesson learned.
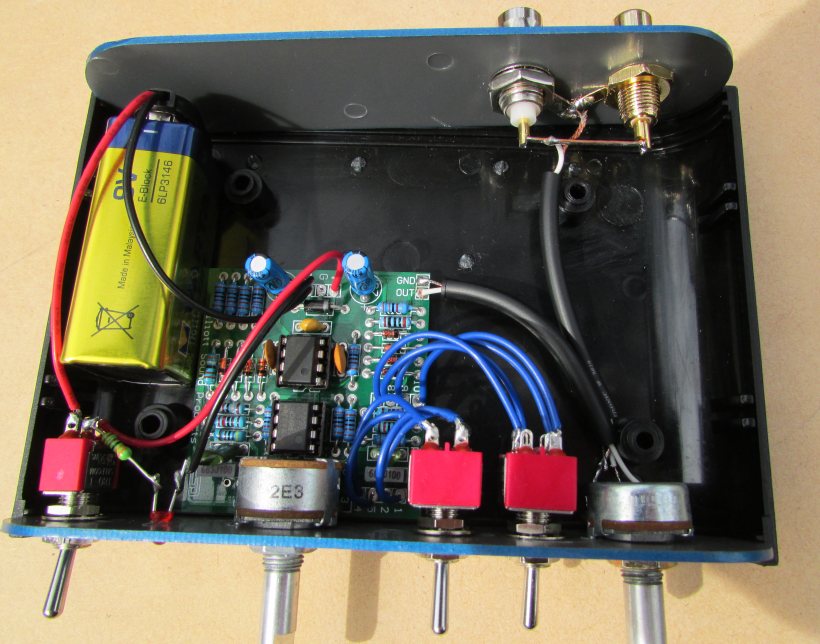
Anyway, the circuit works now, so here are some photos of the completed unit. I built it into a neat little rounded plastic case I got at the local electronics retailer for only a few bucks.


The oscillator is fun to play with. I spent some time with the square wave generator re-creating favourite video game sound effects from the 80s and early 90s :)
Using the sine wave output set as low as it will go and turning the stereo up loud is pretty cool as well. You can barely hear anything, but you can feel the whole room pulsing with the deep bass. You should be able to use this to listen for cone break-up in woofer drivers.