Modding my Stratocaster
-
25 September 2016 |
-
26 September 2016 |
My Stratocaster had been in need of some maintenance for a while. It had some fret wear around the first position and the strings really needed changing. I decided that since I needed to pull the neck off to polish out the fret wear, it was high time I pulled the scratch plate off and had a poke around inside with a soldering iron.
The guitar is a 2013 Sienna Sunburst American Standard with a rosewood fretboard. I bought it for my thirtieth birthday after it became clear to me that playing guitar was not just going to be a passing phase. It’s a beautiful instrument and really nice to play.
Like all single coil strats, it has a five-way selecter switch and a certain amount of pick-up noise - especially when only a single pick-up is selected. The bridge pick-up is also very bright and can be difficult to tame in its default configuration.
I have therefore, for some time, wanted to modify the default wiring scheme to give me better tonal control over the guitar. As a bonus, it would be nice to add more pick-up selection options than the usual five.
Before pulling out the soldering iron, I went looking around on the net to see what other people have done. This was time well spent, as there is a wealth of information on strat modding out there. In the end, I decided to simply follow the instructions of this youtube video as it described a modification which was pretty much exactly what I wanted: tonal control over the bridge pick-up and plenty more pick-up selection options. There are, of course, any number of other things you can do to a strat to get the sound you want, so you should definately look around.
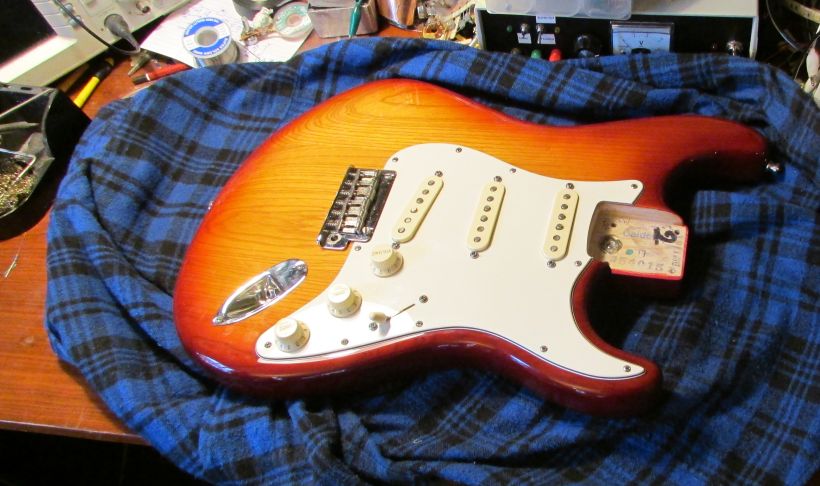
Before I go any further I just need to apologise for the quality of the photography in this post. My work-bench is stuck in a dark corner and it’s quite hard to get anything that even resembles a good shot there, as I always get heaps of glare from my lamp and without the lamp it’s too dark to take photos. I’ve tried pointing the lamp at the ceiling with mixed success.
Anyway, before modding anything I did something I’ve wanted to do for ages: shield the electronics cavities! Electrical shielding surrounds sensitive circuitry with a grounded conductive barrier that sinks air-borne noise like power supply and fluourescent light hum before it can get to places it isn’t wanted. It will reduce the amount of hum, buzz and other random crap you hear through your speaker cab.
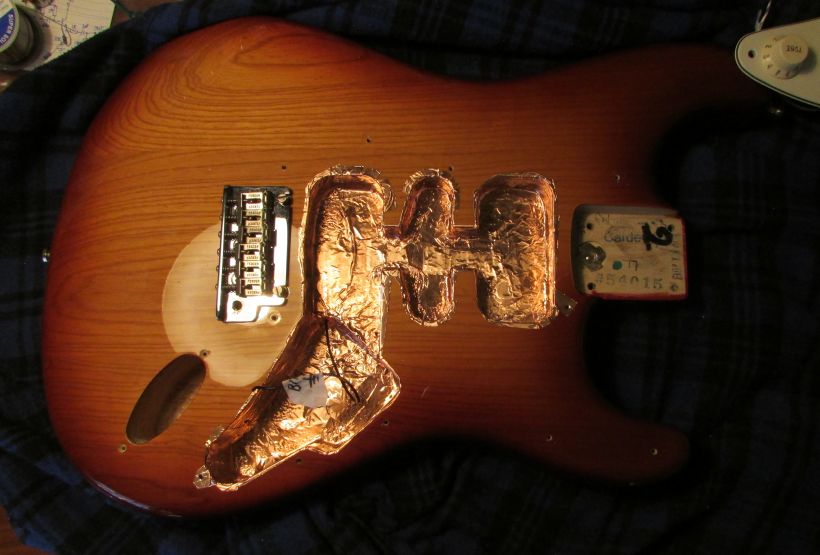
To do this, I used copper foil tape with conductive adhesive. Don’t use the other type or you’ll have to go over the whole job with a soldering iron electrically joining all the little pieces together. I don’t remember where I got my roll as it’s been sitting in a junk box for a while, but ebay’s a pretty safe bet. It’s also a good idea to go over the shield with a multimeter set to continuity to make sure it has formed a single entity (at least from an electrical point of view).
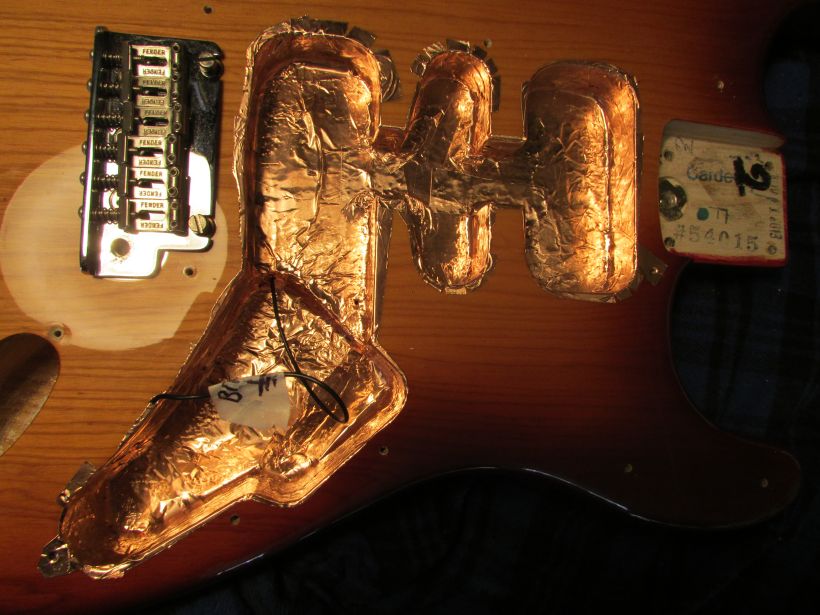
In my case, I didn’t have to put foil on the back of the scratch plate as there was already aluminium shielding applied there by the factory. If your guitar doesn’t have that, you’ll have to put tape across the plate as well. The cavity shielding I applied also sticks out of the cavities all the way around. This is to form a good low inductance path to ground. The foil on the back of the scratch plate is grounded and you want the cavity shielding to have an excellent ground connection or it won’t do anything.
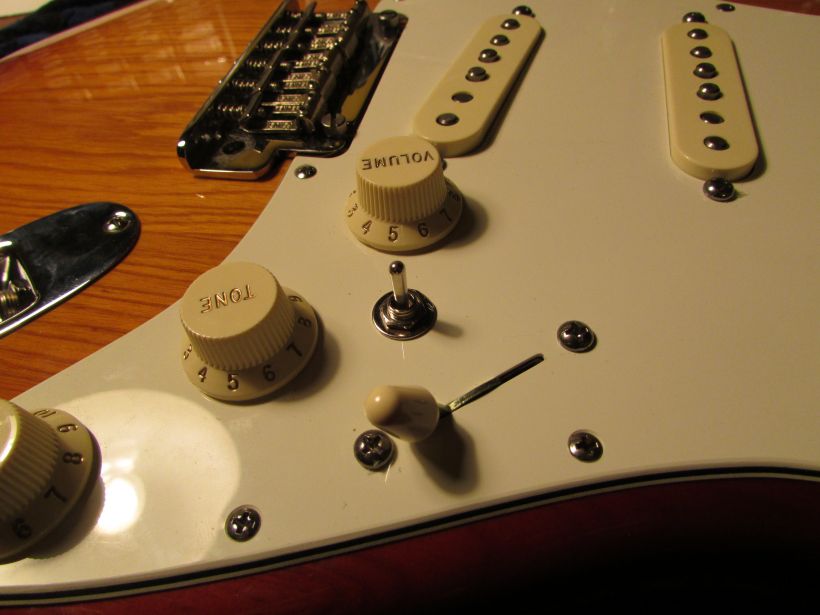
Next was the mod. To perform the mod, I bought an ON-ON-ON toggle switch on ebay and drilled a hole for it in the scratch plate near the five-way selector switch. I mounted the switch and used my multimeter to ensure its metal chassis was properly grounded.
On a Stratocaster, the rear case of the volume pot is used as the ‘star’ ground point. This means that all ground leads come back to this point and then to the output jack. This helps to avoid ground loops and hum, but more practically, if you don’t get electrical continuity between the star ground point and your modifications, then they won’t work.
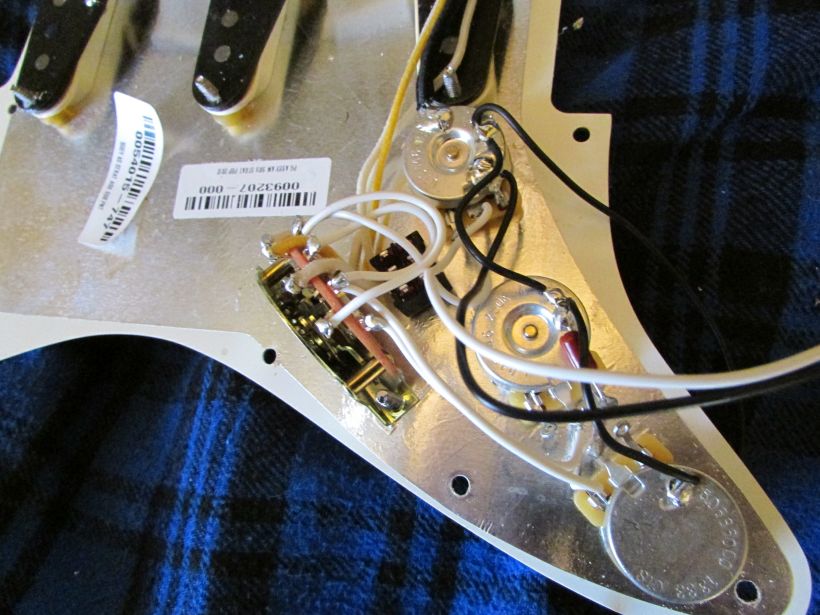
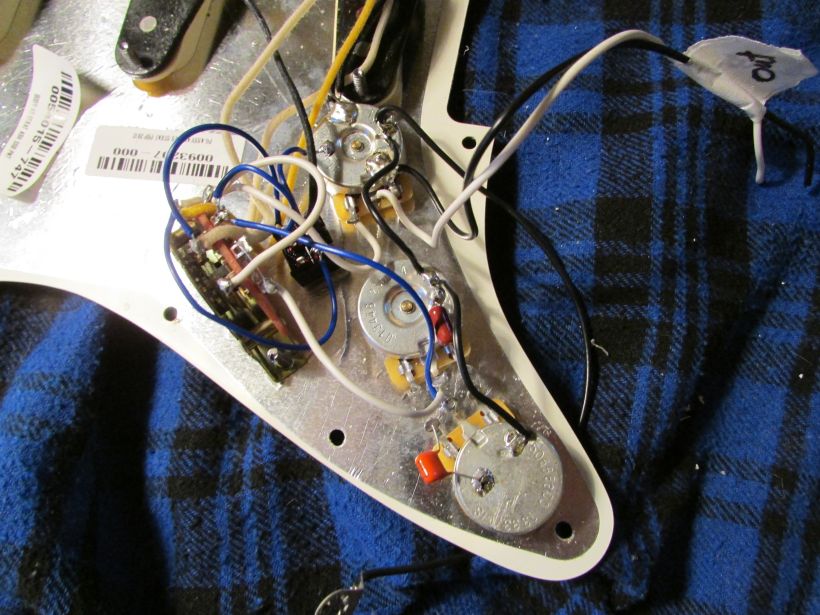
After following the wiring instructions detailed in the youtube video I previously mentioned, it looked like this:
After replacing the scratch plate, this is what the top of the guitar now looks like:
I then turned my attention to the neck. I cleaned off built-up finger gunge using very dilute detergent and water and a (previously new) toothbrush. This is done very quickly and wiped off with a clean rag imediately to stop the fretboard absorbing the water. After cleaning, I polished out the fret wear using a succession of 600, 800, 1200, 1500 and 2000 grit sandpaper, followed by a quick buff with Nevr-Dull metal polish. This makes the frets come up like new.
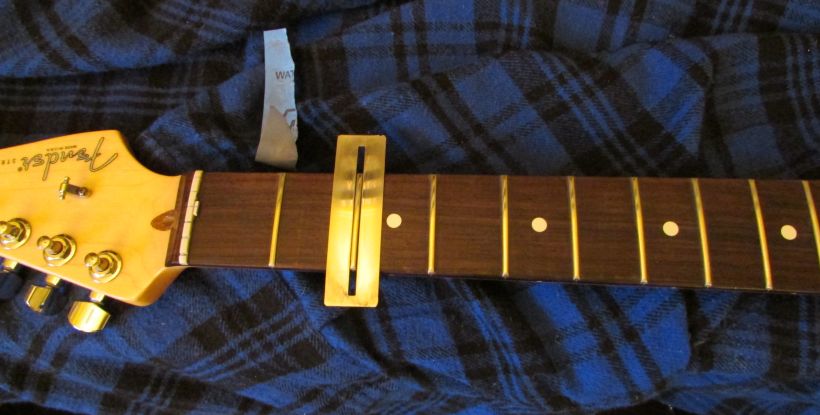
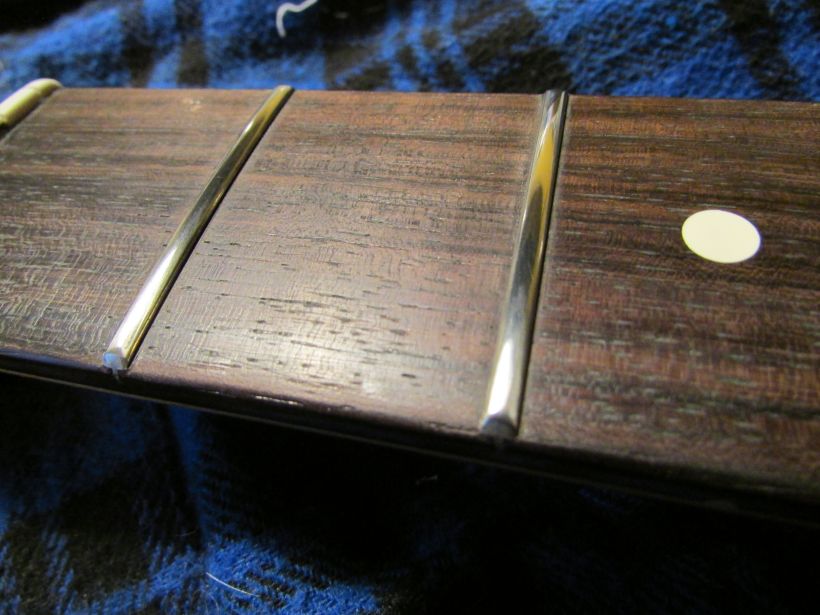
After putting the guitar back together and restringing it, I spent a happy couple of hours playing around. Firstly, it still works - which is always nice to be able to say after you’ve pulled something apart and put it back together. Secondly, although not completely gone, the buzz from the single coil settings is greatly reduced, so the shielding was worth the effort. Thirdly, there is a whole new world of tone to explore in the nine different pick-up combinations I now have.
It’s going to take me a while to figure out what sounds good where, but so far I’m very happy - it’s like getting a brand new strat all over again :)
